SLLU361 December   2022


  1.   Abstract
  2.   Trademarks
  3. 1Cautions and Warnings
  4. 2Introduction
  5. 3Quick Start Guide
  6. 4Hardware and Software Overview
    1. 4.1 Hardware Connections Overview – MCT8315EVM
    2. 4.2 Connection Details
    3. 4.3 MSP430FR2355 Microcontroller & User Interface
    4. 4.4 LED Lights
    5. 4.5 User-Configurable Settings
  7. 5Hardware Setup
  8. 6MCT8315 GUI Application
    1. 6.1 Running the GUI
    2. 6.2 Offline Installer
  9. 7MSP430FR2355 Interface Firmware
    1. 7.1 Downloading Code Composer Studio and Importing MSP430FR2355 Interface Firmware Code
    2. 7.2 Using the eZ-FET to Program the MSP430FR2355
  10. 8Schematics
    1. 8.1 Main Supply and Pi Filter
    2. 8.2 Connectors and Interface
    3. 8.3 USB to UART
    4. 8.4 MCU Programming and Debug
    5. 8.5 MSP430FR2355 MCU
    6. 8.6 MCT8316A 3-Phase Sensorless Trapezoidal Control Integrated Driver
    7. 8.7 Buck Regulator
    8. 8.8 Status LEDs
    9. 8.9 Switches and Speed Input
  11. 9Revision History

Hardware Connections Overview – MCT8315EVM

Figure 4-1shows the major blocks of MCT8315EVM evaluation module. The MCT8315EVM is designed for an input supply from 4.5-V to 35-V. The MCT8315 includes three integrated half-bridges and implements a sensorless trapezoidal control algorithm to spin a motor with up to 5-A peak current. It also integrates an adjustable buck regulator.
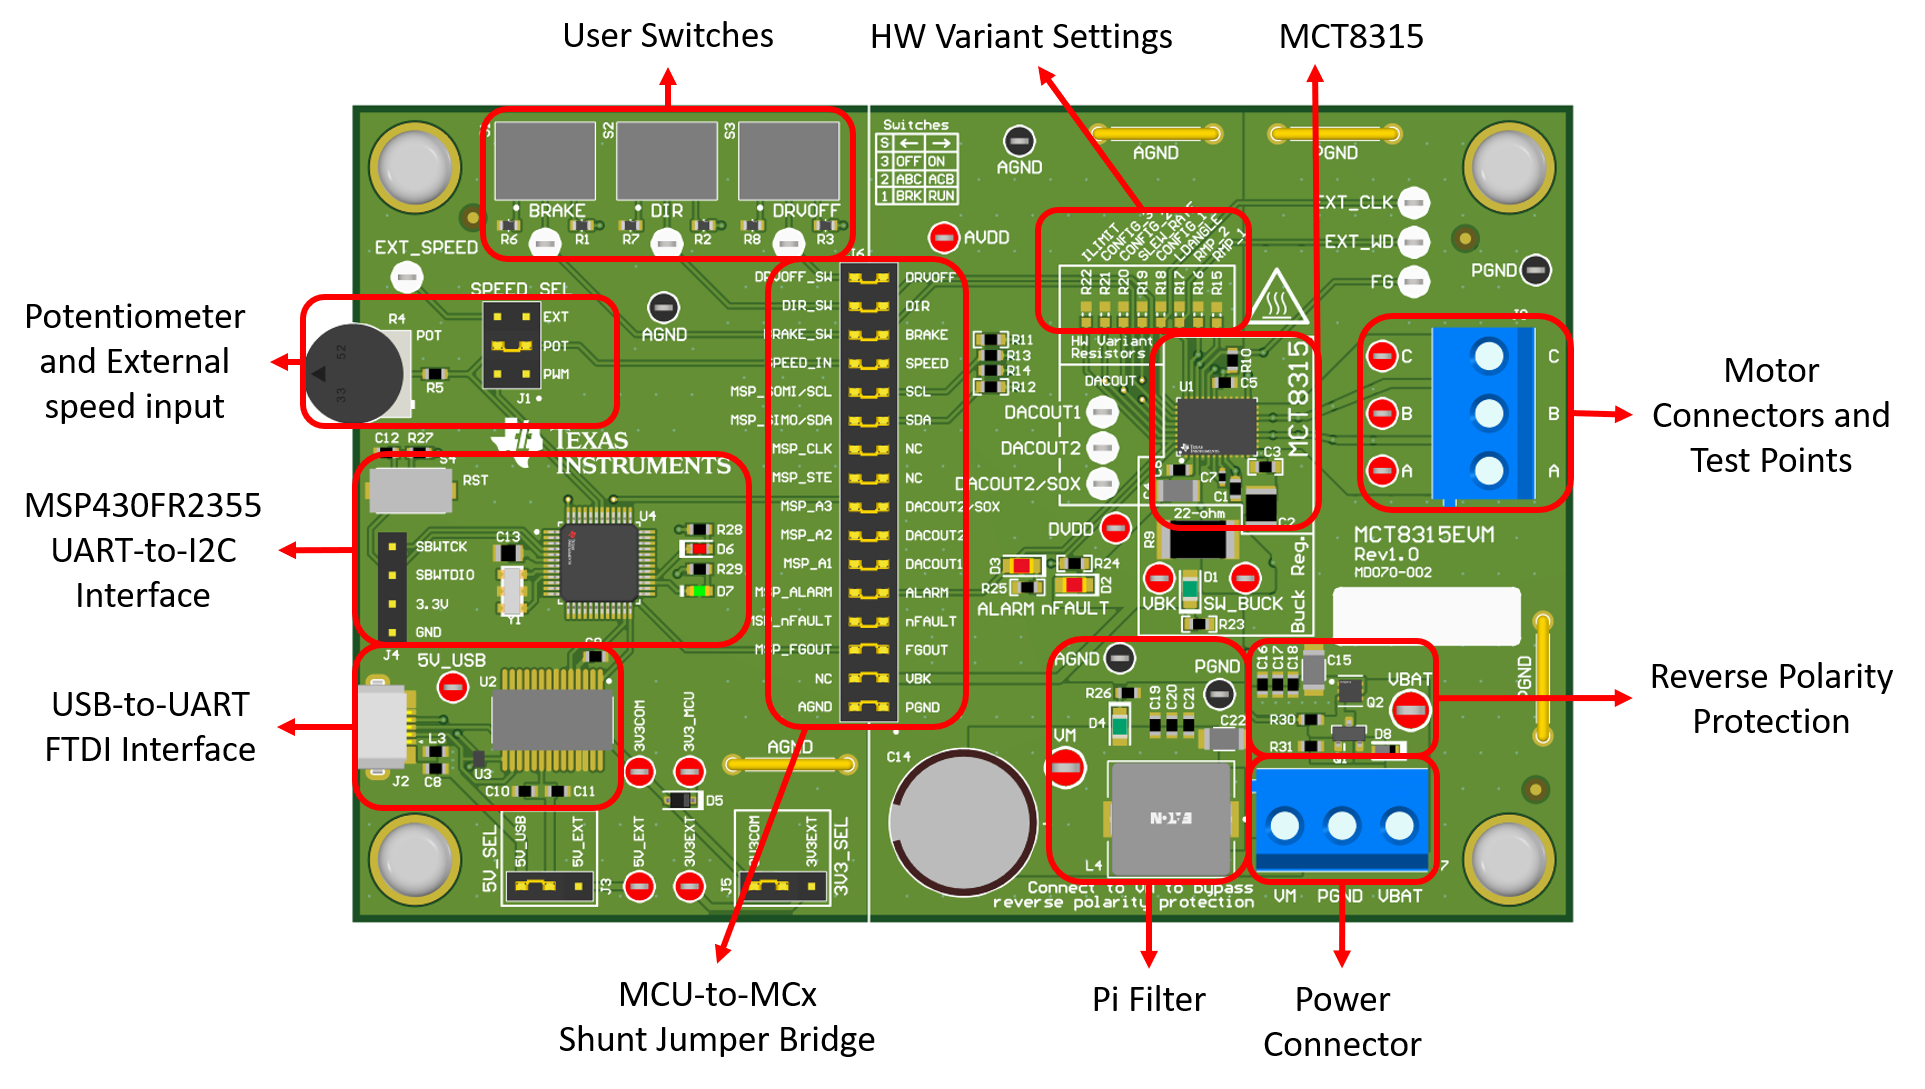
GUID-77BF3D00-7767-425E-A3CF-80679610FBF5-low.pngFigure 4-1 MCT8315EVM Major Hardware Blocks