SLUUBE0A November 2015 – August 2021 TPS549A20
7.2 PMBUS Setup and Verification
The TPS549A20EVM-737 contains a 10-Ω series resistor in the feedback loop for loop response analysis.
- Download the Graphical User Interface (GUI) from www.TI.com.
- Type fusion in the TI search bar.
- Select FUSION_DIGITAL_POWER_DESIGNER from the search result.
- Download and install the latest release version of the software. The most current version to date is version 1.8.325 of the Fusion Digital Power Designer.
- Connect the USB Interface Adaptor EVM (see www.ti.com for more information) to J4 of the EVM. Ensure that Pin 1 of the USB interface adaptor (red wire) is connected correctly to Pin 1 of J4 on the EVM.
- Connect the USB wire of the USB interface adaptor to one of the USB ports on the computer tower.
- Ensure that the EVM is powered up and connected to the USB interface adaptor before opening the Fusion Designer GUI.
- Double click the shortcut icon on the desktop for the Fusion Designer GUI. Use the online version.
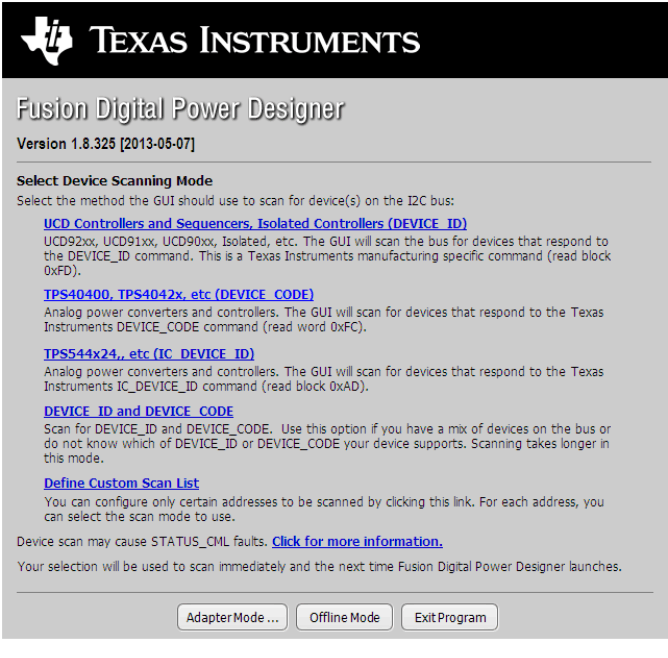
- Double click on the TPS40400, TPS4042x, ect (DEVICE CODE) from the Select Device Scanning Mode window as shown in Figure 7-1.
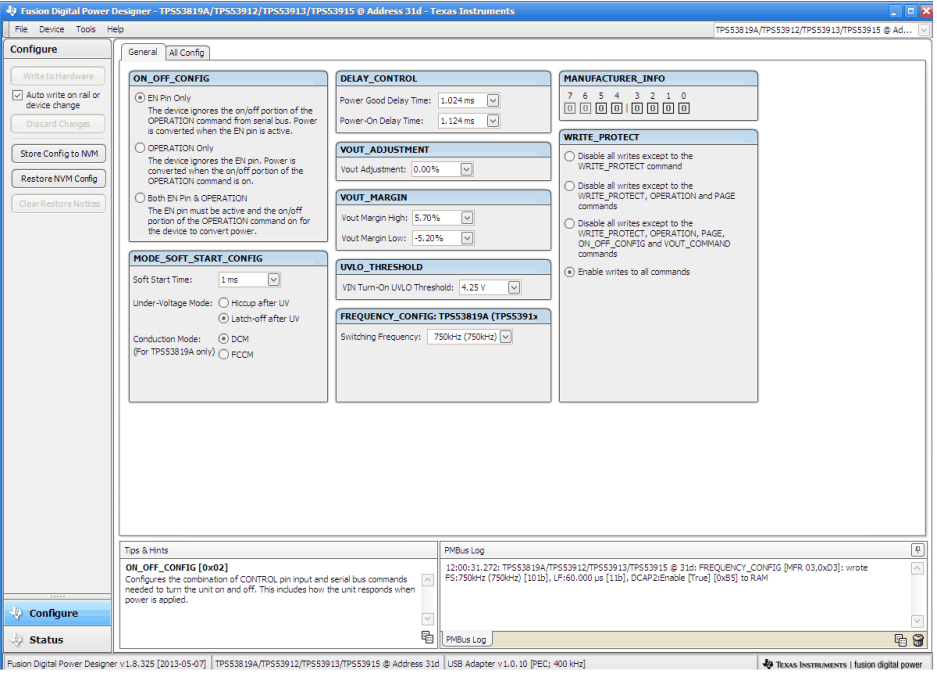
- When the GUI is loaded (see Figure 7-2), verify communication between the GUI and the EVM by changing the frequency of the EVM.
Note:
The TPS549A20EVM is pre-set to a 400-KHz switching frequency.
- Use the oscilloscope to monitor the switching frequency on the EVM on TP6.
- Select a different frequency by clicking on the drop down box of the FREQUENCY_CONFIG:TPS53819 (TPS5391X).
- Click on Write to Hardware and monitor the change of the switching frequency on the oscilloscope.
See the TPS549A20 datasheet (SLUSAS9) for more information regarding PMBUS registers.
 Figure 7-1 Select Device Scanning Mode
 Figure 7-2 GUI for the Fusion Digital Power Designer