SLVUBT1A October 2019 – June 2020 TPS50601A-SP
3.2 Steps to create project in Capture®
The following steps explain the procedure for creating a project in Capture and adding the part created from the netlist:
- Open the Capture application from Cadence - v17.2.0 or above.
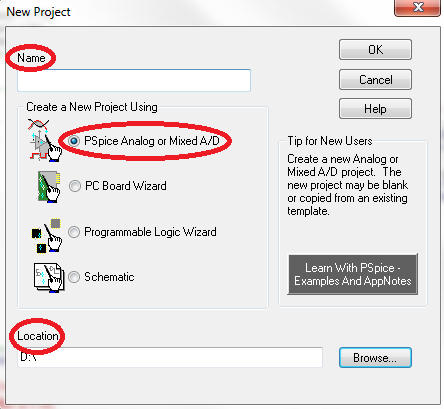
- Click on File → New → Project.
- Enter a project name and location, choose PSpice Analog or Mixed A/D from the options, and click "OK".
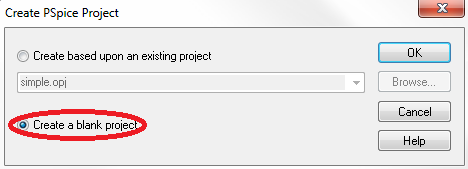
- Once the Create Pspice Project dialogue box opens, select the "Create a blank project" option and click "OK".
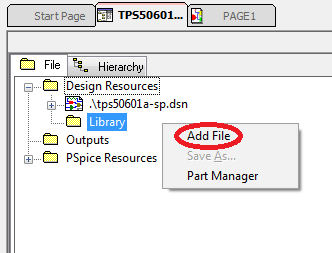
- A new project will be created and the project window will open. Right click on the Library folder and select "Add File".
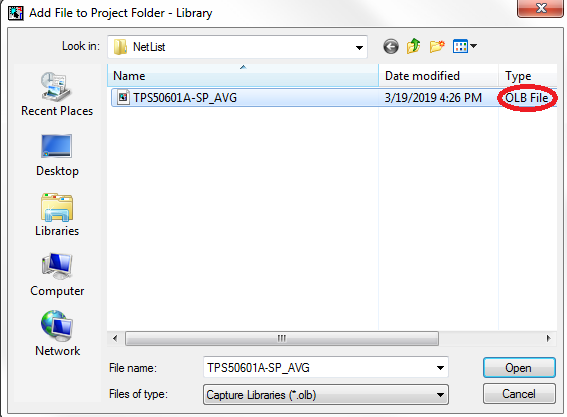
- Choose the ***.olb file that was previously created, add to the dialogue box, and click "Open". This will add the part symbol to the project.


