SNAU278 July   2022


  1.   Abstract
  2.   Trademarks
  3. 1LMX2594PSEVM Evaluation Module
    1. 1.1 Evaluation Module Contents
    2. 1.2 Evaluation Setup Requirement
    3. 1.3 Resources
  4. 2Setup
    1. 2.1 Connection Diagram
    2. 2.2 Power Supply
    3. 2.3 Reference Clock
    4. 2.4 SYNC Input
    5. 2.5 RF Output
    6. 2.6 Programming
    7. 2.7 Evaluation Software
  5. 3Typical Measurement
    1. 3.1 Category 3 Synchronization
    2. 3.2 Phase Noise Improvement
  6. 4Schematic
  7. 5PCB Layout and Layer Stack-up
    1. 5.1 PCB Layer Stack-Up
    2. 5.2 PCB Layout
  8. 6Bill of Materials
  9. 7EVM Modification
  10. 8Troubleshooting Guide
  11. 9Reference PRO
    1. 9.1 Output Frequency Selection
    2. 9.2 Output Format Selection
    3. 9.3 Typical Output Characteristics
    4. 9.4 Firmware Update

Troubleshooting Guide

If the EVM does not work as expected, use the following chart to identify potential root causes. Remember:

  • Verify that the EVM is in working order before you make modifications to the EVM or change the default settings
  • Register readback requires the correct hardware and software setup.
  • The POR current of the LMX2594PSEVM is approximately 400 mA.
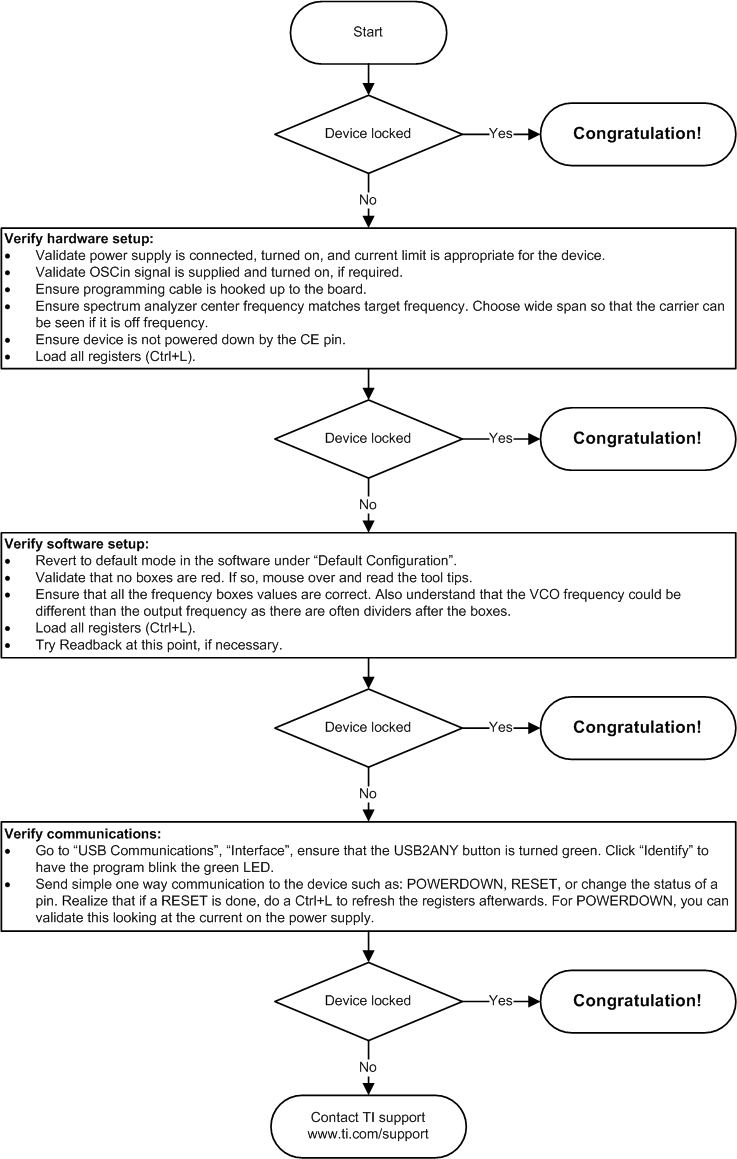
GUID-20220722-SS0I-QNZH-BKWT-CMWLQ3M1CNNX-low.gifFigure 8-1 Trouble Shooting Guide