SPRAD28 October 2022 AM2431 , AM2432 , AM2434 , AM2631 , AM2631-Q1 , AM2632 , AM2632-Q1 , AM2634 , AM2634-Q1 , AM263P4 , AM263P4-Q1 , AM26C31 , AM26C31-EP , AM26C31M , AM26C32 , AM26C32-EP , AM26C32C , AM26C32M , AM26LS31 , AM26LS31M , AM26LS32A , AM26LS32AC , AM26LS32AM , AM26LS33A , AM26LS33A-SP , AM26LS33AM , AM26LV31 , AM26LV31E , AM26LV31E-EP , AM26LV32 , AM26LV32E , AM26LV32E-EP , AM26S10 , AM2732 , AM2732-Q1
- Abstract
- Trademarks
- 1 Building for Debug
- 2 Code Composer Studio Stop-Mode Debugging
- 3 Debug Logging
- 4 Multi-Core Debug
- 5 Debugging Arm Cortex-R5 Exceptions
- 6 Debugging Arm Cortex-M4 Exceptions
- 7 Debugging Memory
- 8 Debugging Boot
- 9 Debugging Real-Time Control Loops
- 10E2E Support Forums
9.3.4 Launch Real Time Debug
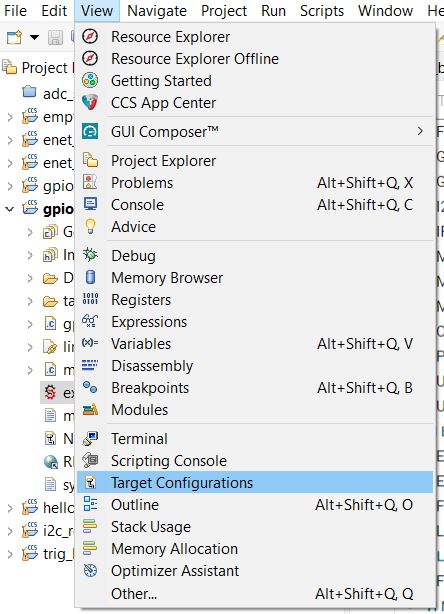
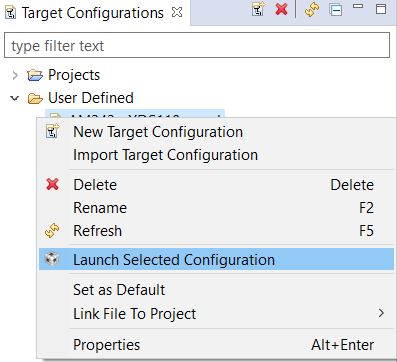
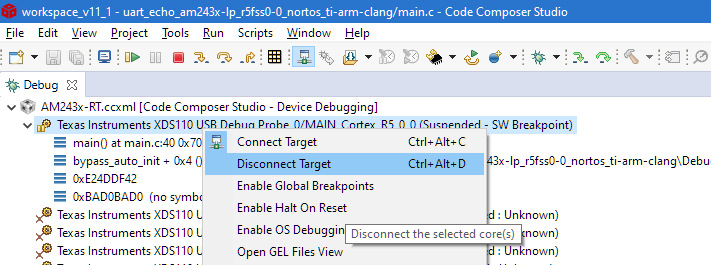
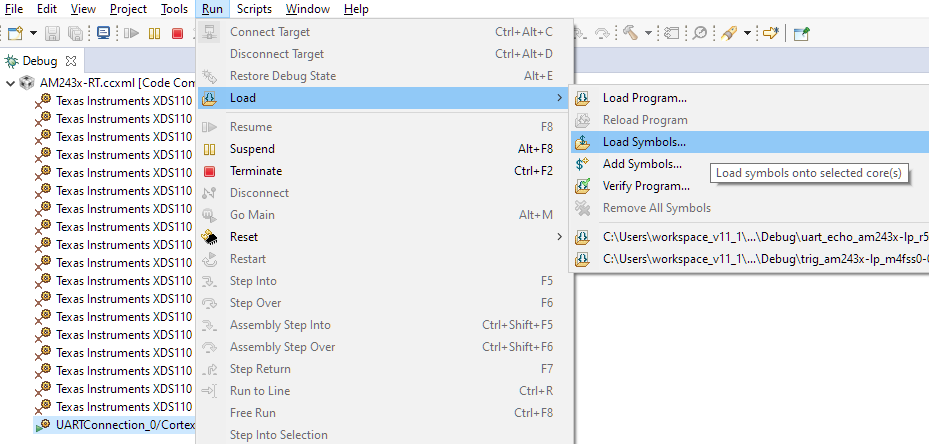
After building the program, the debug window should be opened with the target configuration file you created. If the created target configuration file is not already opened, it can be located into "User Defined" folder of the "Target Configuration" window. Right click on the file, a menu shows up and there is a option "Launch Selected Configuration" as shown in Figure 9-11. Then, debug window shows up. The steps to connect target, load image and run via JTAG can be found in many CCS tutorials. The processor must be running continuously before connecting to UART. As the UART connection is based on continuous operation of the program, the UART connection will be broken and CCS will be frozen by Break-point, Suspend, Terminate or any other events stopping the Serial Command Monitor program from running. Sometimes, it is just a habit to use those features when they are available. It is recommended to disconnect target via JTAG while using UART connection. When the processor is running, UART connection can be established by simply select the UART connection → Run → Load → Load Symbols
 Figure 9-11 Locate Target Configuration
File
 Figure 9-12 Launch Selected
Configuration
 Figure 9-13 Disconnect JATG
Connection
 Figure 9-14 Establish UART
Connection