SWRU473A February 2017 – August 2018 CC3120MOD , CC3220MOD , CC3220MODA , CC3220R , CC3220S , CC3220SF
-
SimpleLinkrep%#8482; Wi-Fi® CC3220 Out-of-Box Application
- Trademarks
- 1 Introduction
- 2 Download and Installation
- 3 Installation for Basic Users
- 4 Building the Setup
- 5 Flashing the Out-of-Box Project
- 6 Getting Started With the OOB Demonstration
- 7 Troubleshooting
- 8 Limitations and Known Issues
- 9 Out-of-Box for Advance Users
- Revision History
6.2.1 Local Network Demo
Users can navigate to the demo tab in three ways:
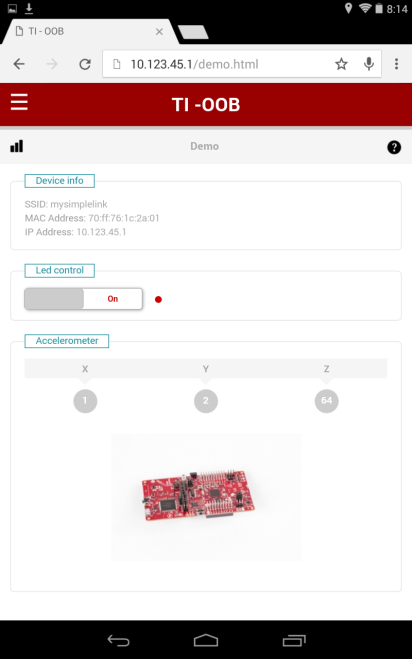
- Explicitly type demo.html as the requested resource on the browser URL, demo.html must be prefixed by the CC3220 IP address (see Figure 21).
- Use the drop-down menu selector on the upper left corner of the screen.
- Click the Start button on the main screen.
On this screen, users can control and get the state of the onboard sensors. These sensors include the red LED (D7) and the accelerometer. Additionally, users can fetch some device-specific information.
Figure 21 shows device information, status of the onboard red LED (D7), and periodic accelerometer readings, together with the equivalent 2D image of the CC3220 LaunchPad board.
 Figure 21. Demo Web Page
 The LED state is indicated as textual off or on under the LED control frame. To change the state of the red LED (D7), slide the switch to the opposite direction. To show board movement, move the CC3220 board. The update rate is once every 200 ms.