SWRU498B February 2017 – December 2021 CC2564C
- Trademarks
- 1 Features
- 2 Bluetooth Profiles
- 3 Sample Application Overview
- 4 CC2564CSTBTBLESW Hardware and Software Requirements
- 5 Setting Up the Hardware
- 6 Setting Up the Software
- 7 Building and Flashing the Bluetooth Code (STM3240G-EVAL)
- 8 Applications
- 9 Classic Bluetooth Sample Applications
- 10Classic Bluetooth + Bluetooth Low Energy Applications
- 11Bluetooth Low Energy Applications
- 12Revision History
7 Building and Flashing the Bluetooth Code (STM3240G-EVAL)
Sample applications for FreeRTOS and NoOS are available for IAR and Keil.
Perform the following instructions to set up applications on each IDE version.
IAR
- Navigate to C:\TI\Connectivity\CC256XBT\CC256xSTM32BluetopiaSDK\v4.2.x.x to open the workspace.
- Select one of the following
samples:
- For NoOS, navigate to \NoOS\STM3240G-EVAL\Samples\ for a list of samples.
- For FreeRTOS, navigate to \FreeRTOS\STM3240G-EVAL\Samples\ for a list of samples.
- Select the demonstration to load onto the device. (This example uses SPPDemo.)
- Navigate to NoOS.
- Navigate to EWARM.
- Select SPPDemo.eww. Note: The IAR IDE opens.
- Select
Debug (see Figure 7-1) or Release Configuration from the drop-down menu. (For this example,
select Debug.)
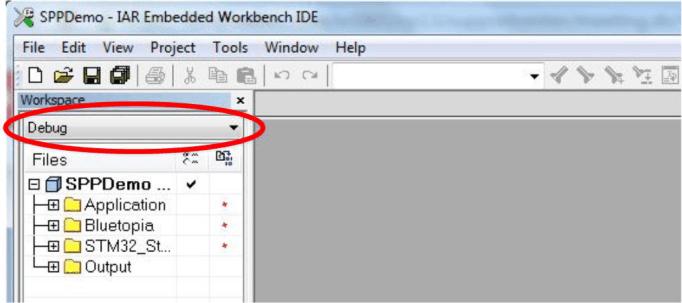 Figure 7-1 IAR Drop-Down Menu
 - Select Download and Debug
from the Project drop-down menu or click the Play icon. (See Figure 7-2.)
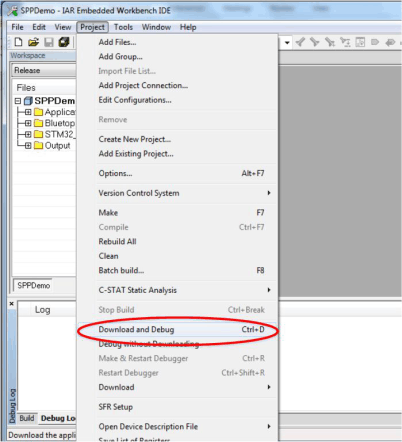 Figure 7-2 Download and DebugNote: The IDE debugs and loads the software onto the device. This process may take 5 to 10 minutes.
 - Click
the red X icon in the IDE to stop debugging. (See Figure 7-3.)
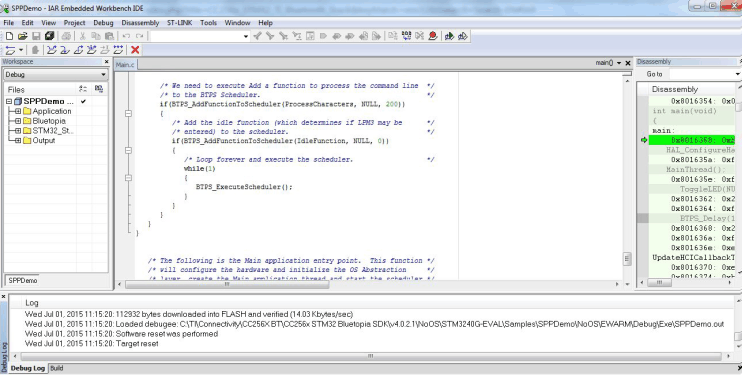 Figure 7-3 Debugging Screen
 - Disconnect the STM3240G-EVAL.
- Reconnect the STM3240G-EVAL.
- Press Reset on the STM3240G-EVAL device.
- Click the GO button in the
IAR (see Figure 7-4).
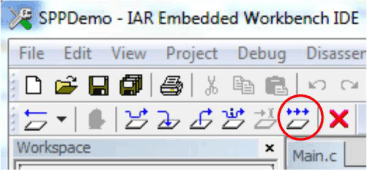 Figure 7-4 The GO Button
Keil
- Navigate to C:\TI\Connectivity\CC256XBT\CC256xSTM32BluetopiaSDK\v4.2.x.x to open the workspace.
- Select one of the following
samples:
- For NoOS, navigate to \NoOS\STM3240G-EVAL\Samples\ for a list of samples.
- For FreeRTOS, navigate to \FreeRTOS\STM3240G-EVAL\Samples\ for a list of samples.
- Select the demonstration to load onto the device. (This example uses SPPDemo.)
- Navigate to NoOS. Note: For RTOS, navigate to FreeRTOS.
- Navigate to RVMDK in the list.
- Click SPPDemo.uvproj.
Note: Keil µVision4 opens.
- Select
Debug or Release Configuration from the drop-down menu. (For
this example, select Debug [See Figure 7-5].)
 Figure 7-5 Debug Drop-Down Menu
 - Right-click SPPDemo_Debug in the project sidebar.
- Select Build target to
build the code. (See Figure 7-6.) Note: Figure 7-7 shows the output when built correctly.
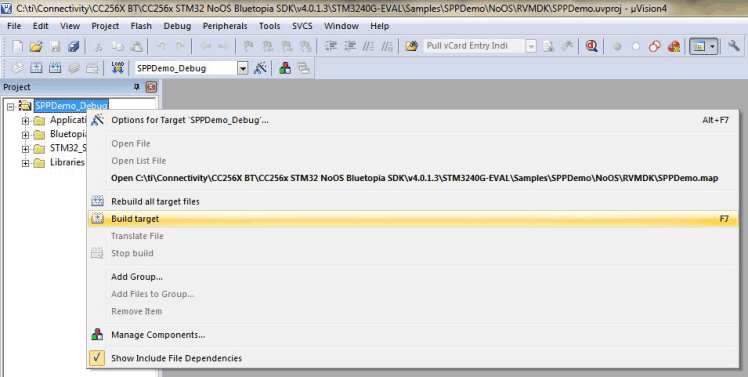 Figure 7-6 Building TargetNote: After a few minutes, the build process finishes and builds a .axf file. Each time you change the configuration, you must build a new .axf file.
 Figure 7-7 Build Output
 - Choose
Debug mode or Release and Debug modes.
- For Debug mode only:
- Select
Start/Stop Debug Session to start loading the profile
on the STM32 device and to work in Debug mode. (See Figure 7-8.)
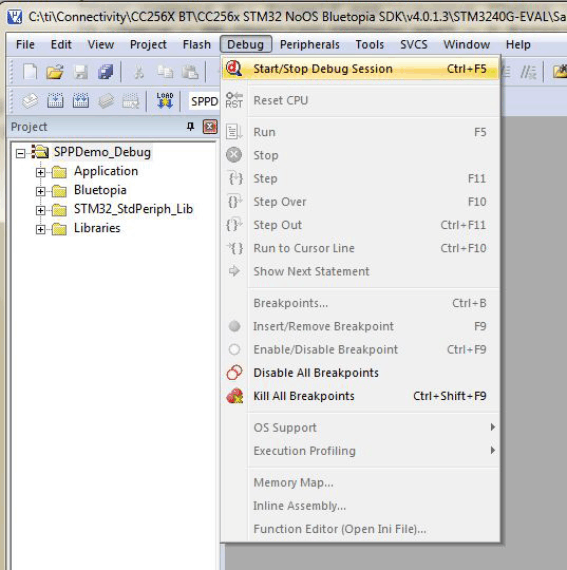 Figure 7-8 Debug
ModeNote: The loading process completes in a few minutes.
 - Stop the
debugging session from the Debug drop-down menu. Note: The profile loads on the STM3240G-EVAL board.
- Unplug the device.
- Plug the device in again to start working with it.
- Select
Start/Stop Debug Session to start loading the profile
on the STM32 device and to work in Debug mode. (See Figure 7-8.)
- For Release and Debug modes:
- Click LOAD
to start loading the profile on the STM32 device. (See Figure 7-9.) Note: The loading process completes in a few minutes.
The profile loads on the STM3240G-EVAL board.
- Unplug the device.
- Plug the device in again to start working with it.
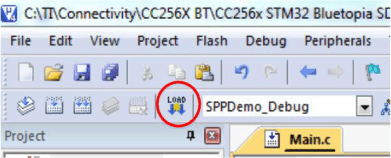 Figure 7-9 Release and Debug
Mode
 - Click LOAD
to start loading the profile on the STM32 device. (See Figure 7-9.)
- For Debug mode only: