SWRU509 February 2017 CC3200
3.2.1 First-Time Configuration Only
On your mobile phone, go to the Settings menu and connect to the SensorTag-xx access point (see Figure 3). The -xx value is the two last digits of the SensorTag MAC address; this value is used to uniquely identify your SensorTag.
Connecting the phone to the access point may take up to 30 seconds the first time it connects.
NOTE
Only one device can be connected to the Wi-Fi SensorTag when it is configured as an access point. On some phone models, the 4G connection and 5-GHz Wi-Fi must be disabled to detect the SensorTag as access point.
 Figure 3. Example of SensorTag Access Point
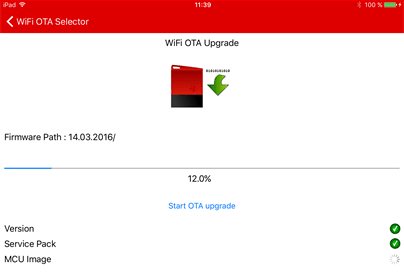
 To launch the SensorTag app, you may have to pull down the menu in the SensorTag device list to refresh the device list. The app detects the new Wi-Fi SensorTag. If the SensorTag is programmed with firmware version 0.98, the app will prompt you to upgrade the SensorTag to the latest version (see Figure 4). Follow the steps to upgrade the SensorTag.
If an upgrade has already taken place and a newer firmware version becomes available, users must first revert back to the factory default (firmware version 0.98). This can be done in one of 2 ways:
- In the mobile application, select Firmware Upgrade → Factory Default.
- Depress the two SensorTag hardware buttons simultaneity for a few seconds until the beep sound is activated.
or
 Figure 4. Wi-Fi® OTA Upgrade
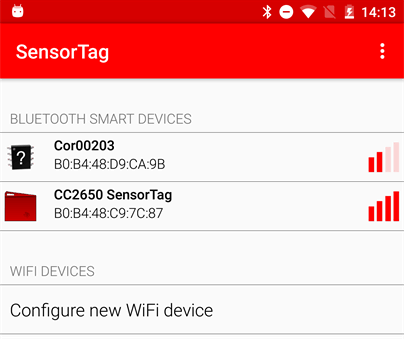
 From the firmware upgrade screen, go back to the SensorTag device list screen (see Figure 5 and Figure 6).
- For IOS® devices, go into Settings and manually reconnect to the SensorTag-xx access point.
- For Android devices, the phone will keep the connection to the SensorTag access point. On the Android device, select Configure new Wi-Fi SensorTag, and follow the on-screen instructions to configure the Wi-Fi settings.
 Figure 5. Available Device
  Figure 6. New Device Found