SWRU580 April 2021 CC2564C , CC2564MODA , CC2564MODN
- Trademarks
- 1 Introduction
- 2 A2DP (AUD) Demo Guide
- 3 A3DP Sink Demo Guide
- 4 A3DP Source Demo Guide
- 5 HFP Demo Guide
- 6 HFP Audio Gateway Demo Guide
- 7 HID Demo Guide
- 8 HSP Demo Guide
- 9 Map Demo Guide
- 10PBAP Demo Guide
- 11SPP Demo Guide
- 12SPPLE Demo Guide
- 13SPPDMMulti Demo Guide
- 14ANP Demo Guide
- 15HFP Demo Guide
- 16HTP Demo Guide
- 17PASP Demo Guide
- 18HOGP Demo Guide
- 19PXP Demo Guide
- 20FMP Demo Guide
- 21CSCP Demo Guide
- 22Revision History
2.2 Demo Application
This section provides a description of how to use the demo application to connect an audio source to it and communicate over Bluetooth.
Device (sink) setup on the demo applicationThe STM32 board is ready to connect right after it starts, to create this connection, either the source or the sink can initialize it.
Initiating connection from the sourceThe A2DP source can be any application that can transmit audio. For our example, we will use an android phone as the demo. In order to connect to the sink, the source needs the sink Bluetooth address or name.
Sink Terminal
- The Bluetooth address can be found at the beginning of the demo application or by typing GetLocalAddress, in this case we can see the bluetooth address.
- The Sink name can be found by
typing GetLocalName and the terminal will print the default name of the
application AUDDemo
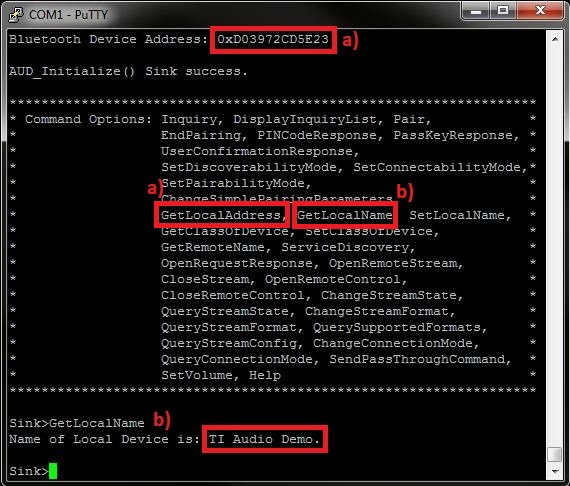 Figure 2-2 AUDDemo Name and
Address
Source PhoneAfter the data of the sink for the connection is known:
- Open the Bluetooth settings menu on the android phone (Settings->Bluetooth).
- Hit on search for devices. The
phone should begin looking for other Bluetooth devices.
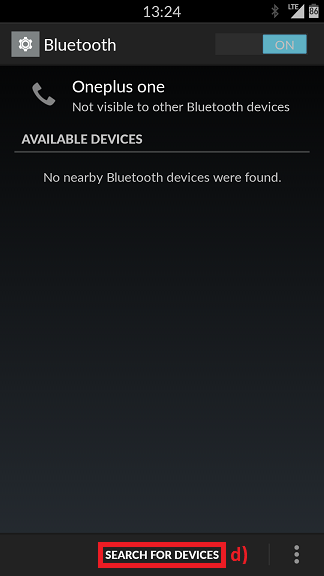 Figure 2-3 AUDDemo Searching for
Devices
 - An AUDDemo or A2DPDemo should
appear like shown below in the picture. Click on the device to begin
pairing.
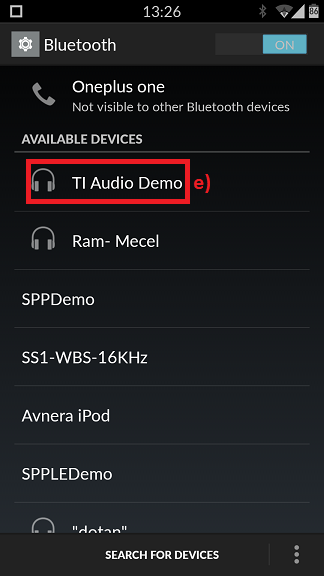 Figure 2-4 AUDDemo TI Device
Name
 - Enter PIN password and remember
it, in the example we use 0000.
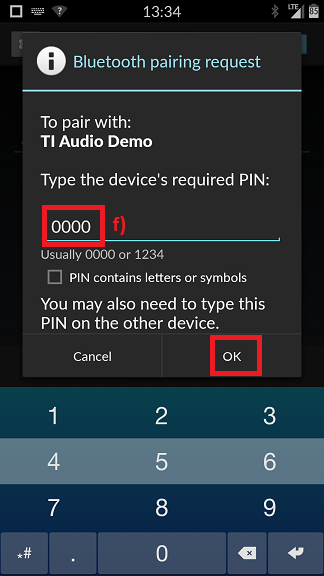 Figure 2-5 AUDDemo Demo
Pin
Sink terminal - In the Sink terminal there is a
request for PIN code that to allow the pairing to complete, enter
PINCodeResponse 0000.
 Figure 2-6 AUDDemo Pin Code
Response
 - After the devices are paired, the
device should show connected on the phone side and on the STM32.
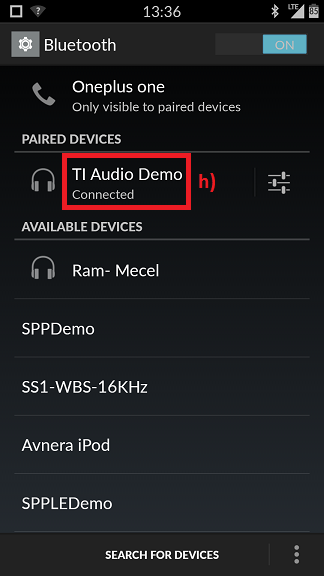 Figure 2-7 AUDDemo Phone
Connected
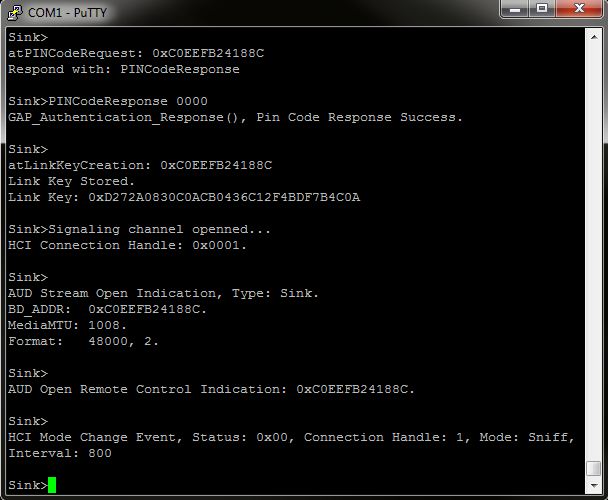 Figure 2-8 AUDDemo Connected From
Source
 - You can now control the audio of the phone from the STM32 board.
- In Order to connect to the
source, the sink must find it first with inquiry command, type inquiry.
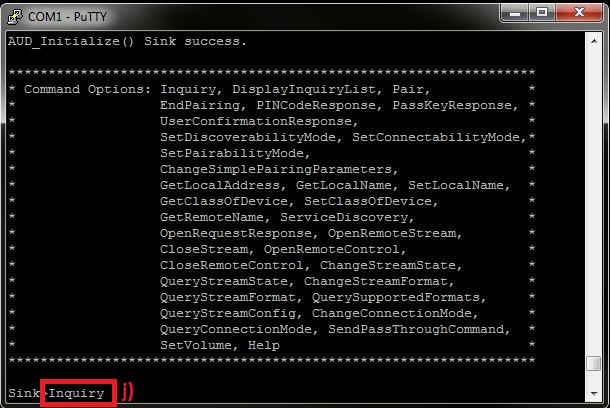 Figure 2-9 AUDDemo Inquiry
Sink
 - The inquiry command generates a list of all the devices in range.
- In order to connect to the source
use the OpenRemoteSteam command with the index of the bluetooth address you
want, in our case we connect to index 2, so we type OpenRemoteStream
2.
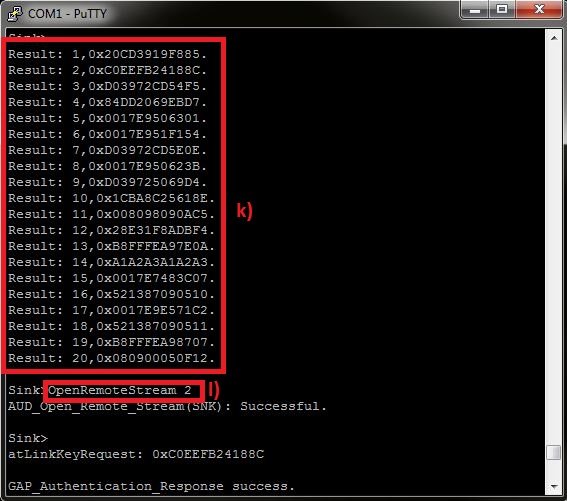 Figure 2-10 AUDDemo Open Remote
Stream
Sink Terminal - Enter PIN password and remember
it. In the example we use 0000.Sink terminal
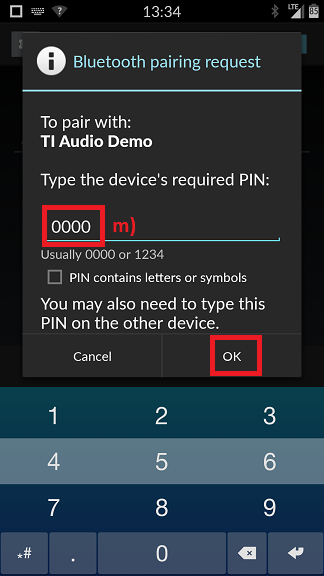 Figure 2-11 AUDDemo Pin
Sink
 - In the Sink terminal there is a
request for PIN code that to allow the pairing to complete, enter
PINCodeResponse 0000.
 Figure 2-12 AUDDemo Pin Code
Response Sink
 - After the devices are paired, the
device should show connected on the phone side and on the STM32.
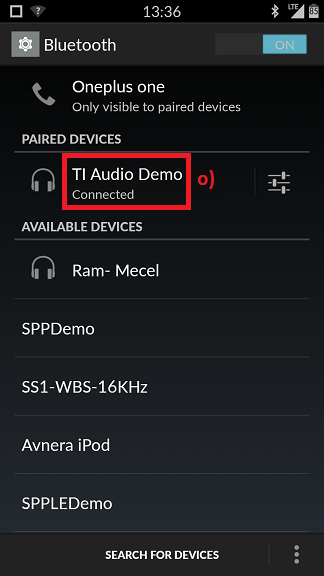 Figure 2-13 AUDDemo Phone Connect
from Sink
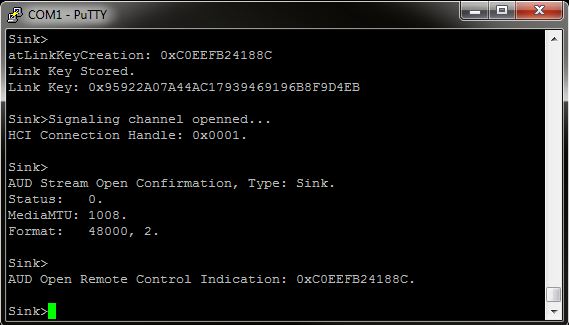 Figure 2-14 AUDDemo Connected From
Sink
Now, after the sink and the source are connected we can start controlling the audio of the source from the sink.
- Open any music application in the
source, in the sink, in order to control the audio use
SendPassThroughCommand Command and a parameter for the command. the
command can be Pause = 0, Play = 1, Stop = 2, Vol. up = 3 and Vol. Down =
4.Note: Volume (Vol.) commands might not work with your device.
 Figure 2-15 AUDDemo Send Pass
Through Command
 - Type SendPassThroughCommand
1. A track will start playing on the devices.
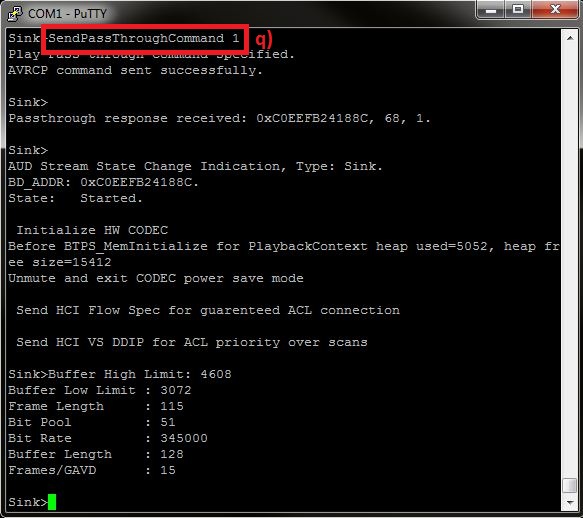 Figure 2-16 AUDDemo Send Pass
Through Command 1
 - Type SendPassThroughCommand 2. A
track will stop playing on the devices.
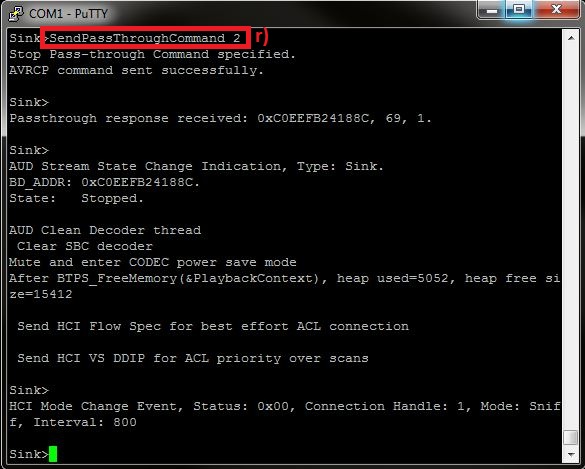 Figure 2-17 AUDDemo Send Pass
Through Command 2
 - In order to change the Stream format: Sample rate and Mono/Stereo, use the ChangeStreamFormat command and a value which represent the supported format index that is needed.
- The supported sink formats and
their indexes can be displayed by typing QuerySupportedFormats.Note: The connection must be in suspend in order to work. ChangeStreamFormat might not work with your device.
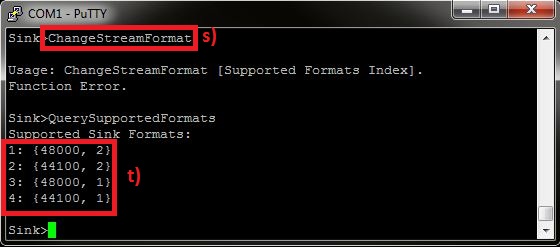 Figure 2-18 AUDDemo Change Stream
Format
Figure 2-18 AUDDemo Change Stream
FormatThe First Number is the index that you choose, the second number is the sample rate in Hz and the third number represents 1 = Mono, 2 = Stereo.
- In order to change the Stream
State: Stopped or Started, use the Changestreamstate command and a value
which represent the stream state 0 = Stopped, 1 = Started. When the
Command Changestreamstate 0 is sent, the devices will enter to suspend mode of
A2DP.Note: Changestreamstate might not work with your device.
 Figure 2-19 AUDDemo Change Stream
State
 - The command ChangeConnectionMode
enable the sink to allow automatically or manual connections or disallow
connection, use the ChangeConnectionMode command and a value which represent the
connection mode Automatic Accept = 0, Automatic Reject = 1, Manual Accept =
2.
 Figure 2-20 AUD Demo Change
Connection Mode