SWRU580 April 2021 CC2564C , CC2564MODA , CC2564MODN
- Trademarks
- 1 Introduction
- 2 A2DP (AUD) Demo Guide
- 3 A3DP Sink Demo Guide
- 4 A3DP Source Demo Guide
- 5 HFP Demo Guide
- 6 HFP Audio Gateway Demo Guide
- 7 HID Demo Guide
- 8 HSP Demo Guide
- 9 Map Demo Guide
- 10PBAP Demo Guide
- 11SPP Demo Guide
- 12SPPLE Demo Guide
- 13SPPDMMulti Demo Guide
- 14ANP Demo Guide
- 15HFP Demo Guide
- 16HTP Demo Guide
- 17PASP Demo Guide
- 18HOGP Demo Guide
- 19PXP Demo Guide
- 20FMP Demo Guide
- 21CSCP Demo Guide
- 22Revision History
16.1 Demo Overview
The Health Thermometer profile enables a Collector device to connect and interact with a Thermometer sensor for use in healthcare applications. There are two roles defined in the profile. The first is the thermometer which measures the temperature and the other is collector which recieves the temperature and settings from the Thermometer. Typically the Thermometer would be present physically on the person/object whose temperature is measured at different locations like the mouth or the armpit. The collector device would be present somewhere close by getting regular temperature updates at specified intervals from the remote thermometer.
This application allows the user to use a console to use Bluetooth Low Energy (BLE) to establish connection between two BLE devices, notify temperature, change measurement intervals and get and change the location of the thermometer sensor.
It is recommended that the user visits the kit setup Getting Started Guide for MSP430, Getting Started Guide for TIVA, Getting Started Guide for MSP432 or Getting Started Guide for STM32F4 pages before trying the application described on this page.
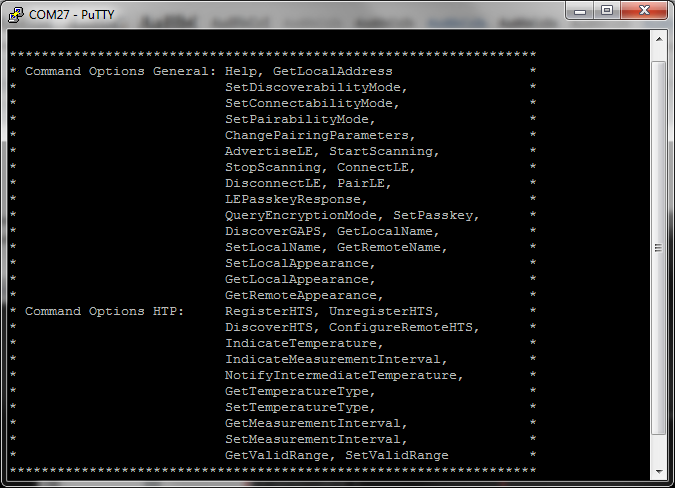
Running the Bluetooth CodeOnce the code is flashed, connect the board to a PC using a miniUSB or microUSB cable. Once connected, wait for the driver to install. It will show up as MSP-EXP430F5438 USB - Serial Port (COM x), Tiva Virtual COM Port (COM x), XDS110 Class Application/User UART (COM x) for MSP432, under Ports (COM & LPT) in the Device manager. Attach a Terminal program like PuTTY to the serial port x for the board. The serial parameters to use are 115200 Baud (9600 for MSP430), 8, n, 1. Once connected, reset the device using Reset S3 button (located next to the mini USB connector for the MSP430) and you should see the stack getting initialized on the terminal and the help screen will be displayed, which shows all of the commands.
 Figure 16-1 HTP Demo Start