SWRU581 March 2021 CC2564C , CC2564MODA , CC2564MODN , WL1831
- Trademarks
- 1 Introduction
- 2 Bluetopia
- 3 Bluetopia Platform Manager (BluetopiaPM)
- 4 Hardware Requirements
- 5 Software Requirements
- 6 Stack Supported Features
- 7 TI BluetopiaPM Stack Linux Architecture
- 8 Installing Bluetopia Platform Manager
- 9 BluetopiaPM Architecture
- 10The BluetopiaPM Server – Pairing Mode
- 11Platform Integration
- 12Adding BluetopiaPM to the SD Card
- 13Terminal Connection
- 14Running a Sample Application
- 15BluetopiaPM Samples
- A C256X EVM Modifications for COM8 Connector
- B Bluetopia Build Log for Reference
- C Sample Run
- D Using the CC256x Service Pack With Linux (TI-BT-4-2-STACK-LINUX-ADDON)
D Using the CC256x Service Pack With Linux (TI-BT-4-2-STACK-LINUX-ADDON)
- Download the latest Service Pack
from the CC256XC-BT-SP product page. Links are located in the CC256x Service
Pack Downloads section.

- Open the
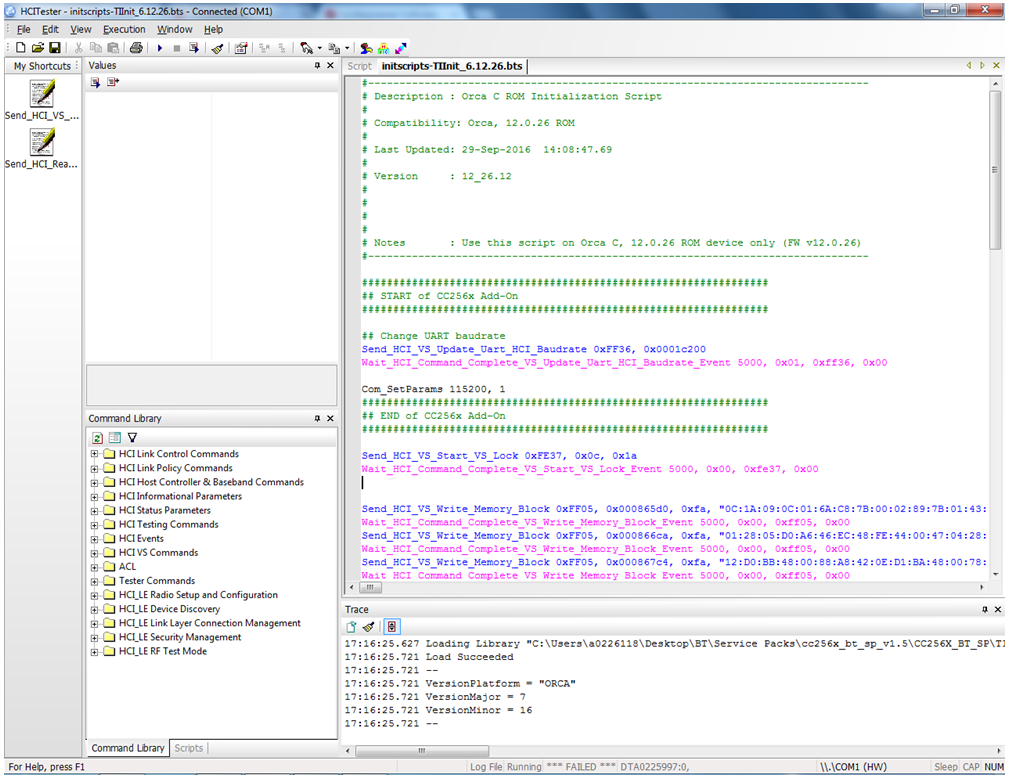
initscripts-TIInit_6.12.26.bts with HCITester. Note: Include the TIInit_6.12.26.xml included in the CC256XC-BT-SP download with HCITester if not already included. (For more details visit the HCI Tester User's Guide).

- Depending on the use-case, you
will need to copy the appropriate add-on (BLE or AVPR) to the main
initscripts-TIInit_6.12.26.bts. If using BT only or BT+BLE (non-assisted modes):
If unsure if the AVPR is needed or not, use this section and ignore the section
b) below.
- BLE Addon
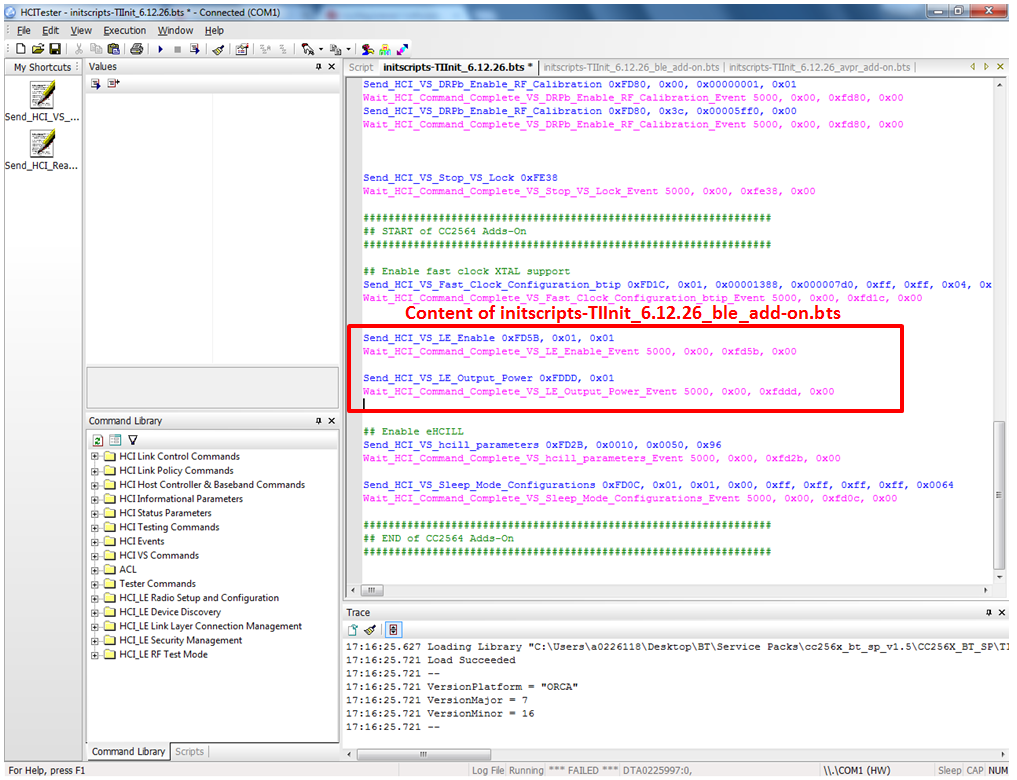
- Open the
initscripts-TIInit_6.12.26_ble_add-on.bts in HCItester.

- Copy the content
of the initsctips-TIInit_6.12.26_avpr_add-on.bts at the end of
the intsctips-TIInit_6.12.26.bts right before the ## Enable
eHCILL section.

- Open the
initscripts-TIInit_6.12.26_ble_add-on.bts in HCItester.
- AVPR Addon
If using AVPR for Assisted A2DP (A3DP) or Assisted HFP: Use the AVPR patches only is using assisted mode. If unsure, follow the instructions to use the BLE add-on.
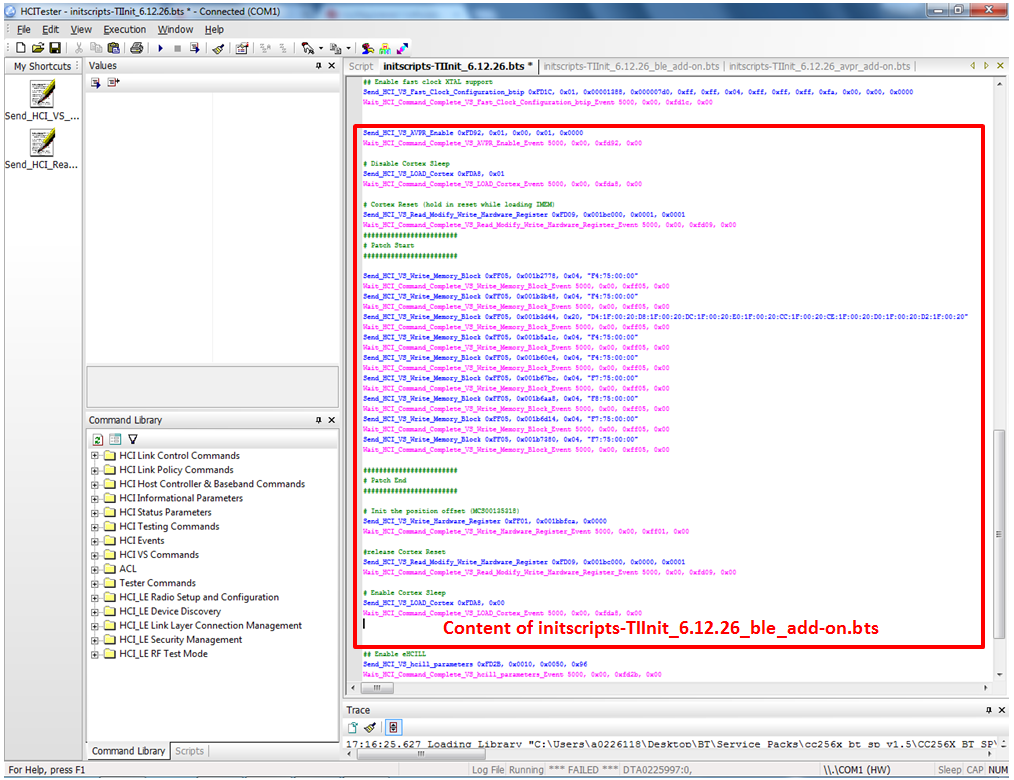
- Open the
initscripts-TIInit_6.12.26_avpr_add-on.bts in HCItester.

- Copy the content of the initsctips-TIInit_6.12.26_avpr_add-on.bts at the end of the intsctips-TIInit_6.12.26.bts right before the ## Enable eHCILL section.

- Open the
initscripts-TIInit_6.12.26_avpr_add-on.bts in HCItester.
- BLE Addon
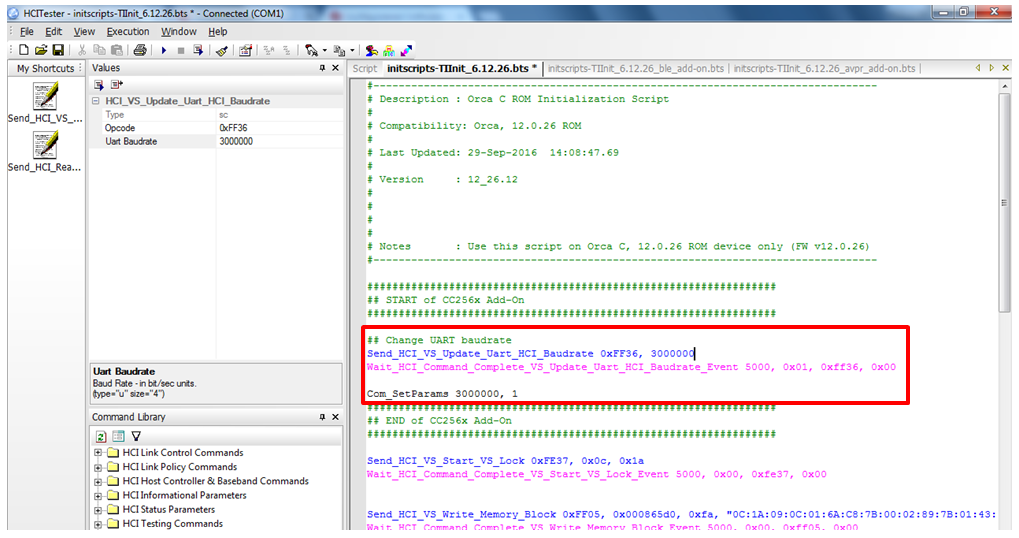
- Optional: The default HCI UART baud rate is set to 115200 in the
initscripts-TIInit_6.12.26.bts. If needed, you can modify the first HCI command
in the initscript-TIInit_6.12.26.bts to change the baud rate.
Example: Changing the baud rate to 3000000)

The first command and its response between the host processor and the CC256X will be sent at 115200 (chip default) baud rate. After this first command of the initscript, the CC256X will switch to the specified new baud rate value (3000000). The host must also switch to this new baud rate after receiving the HCI command response for the first command.
- In every event, replace the 0x00
value in the Number of HCI Commands parameter to any by selecting Edit ->
Replace -> Replace All and configuring the parameters as follows:
Find What: "5000, 0x00"
Replace with: "5000, any"
Replace all
- Save the modified .bts file as
TIInit_6.12.26.bts and copy this file to the [target-root]/lib/firmware
directory of the Linux root.
sudo cp TIInit_<VERSION>.bts
                            [target-root]/lib/firmware/