SLAA936A September 2020 – March 2021 TAS2563
- Trademarks
- 1Introduction
-
2Quick Tuning Procedure
- 2.1 Initialize Tuning
- 2.2 Flatten Protection
- 2.3 Frequency Response Matching
- 2.4 Microphone Setup
- 2.5 Record Reference Device Response
- 2.6 Set Input Gain
- 2.7 Equalizer
- 2.8 Dynamic Range Compression (DRC)
- 2.9 Smart Amp Protection
- 2.10 Speaker Protection Verification
- 2.11 System Signal Chain
- 2.12 Tuning Elements
- 2.13 PDM MIC
- 3Related Documentation
- 4Revision History
2.10 Speaker Protection Verification
After setting all of the tuning parameters correctly for the pink noise matching, the next important step is to actually listen to some music and voice tracks to ensure that negative artifacts do not occur. Choose several songs with varying degrees of volume among different genres. Piano, bass, drums, and voice are varieties of noise that serve as good test parameters for worst-case excursion and distortion.
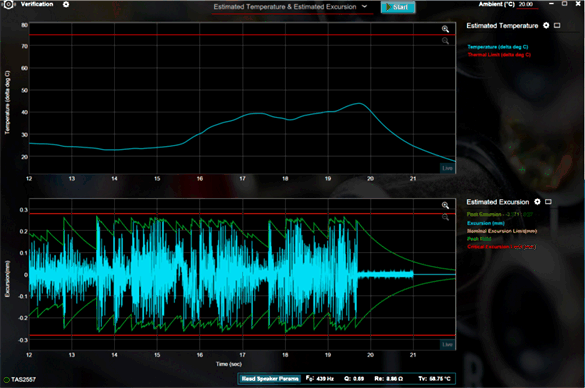
Open the verification page from the bottom of any GUI page (see Figure 2-11). This interface shows two plots by default: estimated excursion and temperature. Play a very loud and busy track from a playlist and press the Start button on the verification page. To pass verification, neither the excursion nor the temperature should exceed their limits as denoted by the red lines. This verification process ensures that the speaker protection is properly working.
 Figure 2-11 GUI Verification Page