SLVUBX5C December   2022  – August 2024 TPS25762-Q1 , TPS25763-Q1 , TPS25772-Q1


  1.   1
  2.   Abstract
  3.   Trademarks
  4. 1Introduction
  5. 2Getting Started
    1. 2.1 Related Documents
    2. 2.2 Hardware
    3. 2.3 Software
    4. 2.4 GUI Installation and Launch
  6. 3Application Configuration Overview
    1. 3.1 Creating a New Application Configuration
    2. 3.2 Loading a Saved Configuration
  7. 4Configuration Parameters
    1. 4.1 System Power
      1. 4.1.1 System Power Management (SPM)
    2. 4.2 Internal & External DCDC
    3. 4.3 VIN Engine On or Off
    4. 4.4 Thermal Foldback
    5. 4.5 USB PORT(S)
    6. 4.6 GPIO Configuration
    7. 4.7 I2C Configuration
    8. 4.8 Device IDs
    9. 4.9 DisplayPort Alt Mode
  8. 5Application Configuration Download
    1. 5.1 Firmware Download Procedure
      1. 5.1.1 Key Upload and Binary File Generation
        1. 5.1.1.1 Firmware Update: USB Endpoint
        2. 5.1.1.2 Firmware Update: I2C
    2. 5.2 Secure Firmware Update
    3. 5.3 Optional USB Driver Installation
    4. 5.4 Direct EEPROM Programming
    5. 5.5 SSH Key Generation
  9. 6Telemetry
  10.   A TPS257XX-Q1 GUI Feature - CUSTOM ID (Version Control)
  11.   B VIN Engine On or Off (TPS257xC-Q1)
  12.   Revision History

Firmware Update: I2C

In the EEPROM FLASH window (see Figure 5-9), the selected low region or full flash binary image is programed into the EEPROM by direct I2C connection.
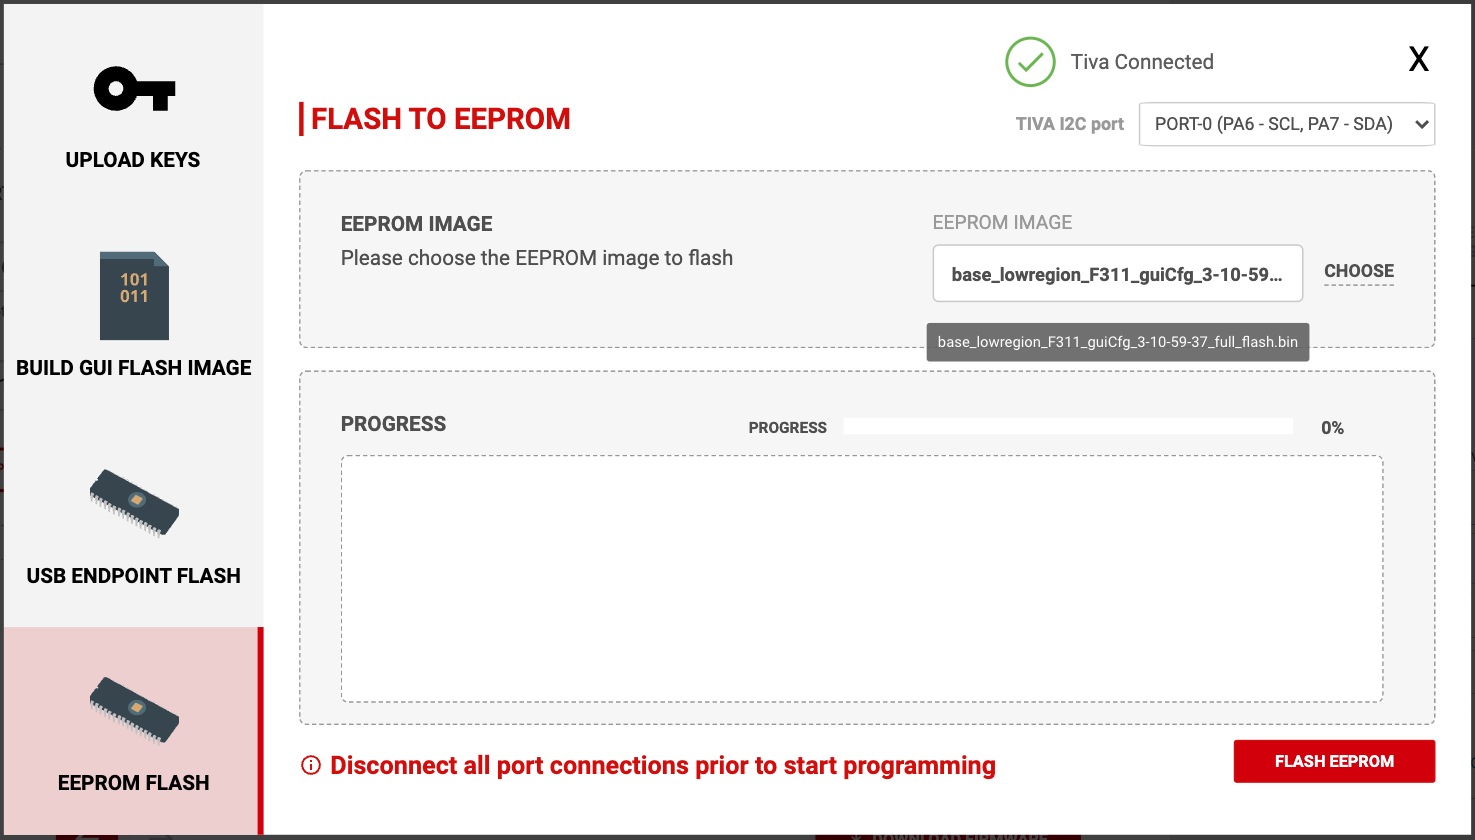
TPS25761 TPS25762 TPS25763 TPS25764 TPS25772 EEPROM FLASH Page Figure 5-9 EEPROM FLASH Page

When evaluating using the EVM from TI, using this method programs the system EEPROM through the USB connection to the onboard TIVA microcontroller. Ensure that the correct serial port is configured if the TIVA USB connection cannot be established (see Figure 6-4). In addition, any I2C-capable programming tool can be used to program a saved binary file generated by the TPS257XX-Q1-GUI tool. This is the method used in custom-built hardware when programming the EEPROM via I2C.

Once the I2C connection is established and the desired binary file is chosen in the EEPROM IMAGE field, selecting the FLASH EEPROM button downloads the binary image. Progress is displayed in the GUI until the update is completed.

Note: Disconnect all USB-C devices from ports prior to programming the EEPROM. All ports must remain disconnected during programming.